Skip to content
Learn how to optimize printer settings like temperature, speed, bed leveling and more to ensure flawless initial layers every time. Expert advice on calibrating for different materials, common issues, and tricks like brims and adhesives. Master 3D printing fixes most important layer for successful, high quality 3D printing.
Successfully printing that flawless startup phase requires understanding how key factors like temperature, speed, bed leveling and material choices influence the quality of the first layer being laid down. This article will explore these critical settings and variables in depth. Readers will learn calibration techniques for smoothing out any irregularities or imperfections. With the proper optimizations covered here, users can guarantee smooth and reliable foundations for all of their 3D printing fixes parts.
Causes of 3D Printing Fixes Warping and First Layer Issues
Bed Temperature Issues
Bed Too Cold
If the bed temperature is too low during the initial 3D printing fixes layer, the plastic will not properly adhere to the bed. Having the bed temperature at least 10°C below the melting point of the filament helps it stick smoothly. For PLA, a bed temperature of 60°C is generally recommended. For ABS, a higher bed temperature around 80°C works best.
Bed Too Hot
On the other hand, having the bed temperature too high can cause other problems like warping, drooping or elephant’s foot effect. This is because the plastic becomes too molten and spreads out more than intended. It is important to balance the bed temperature to get just the right adhesion without excess spreading.
Filament Temperature Issues
Printing Too Cold
If the extruder temperature printing the initial layer is too low, the plastic may not fully melt and flow out smoothly and evenly. This leads to poor layer adhesion, ripples or missing spots in the layer. Generally prototyping PLA prints best at 185-210°C and ABS at 210-240°C for good layer bonding.
Printing Too Hot
Like with the bed, having the extruder temperature too high can cause excess oozing or drooping of the plastic. This makes it difficult for the nozzle to deposit clean and sharp lines. It may also cause the plastic to warp as it cools if not given enough time to slowly solidify after deposition.
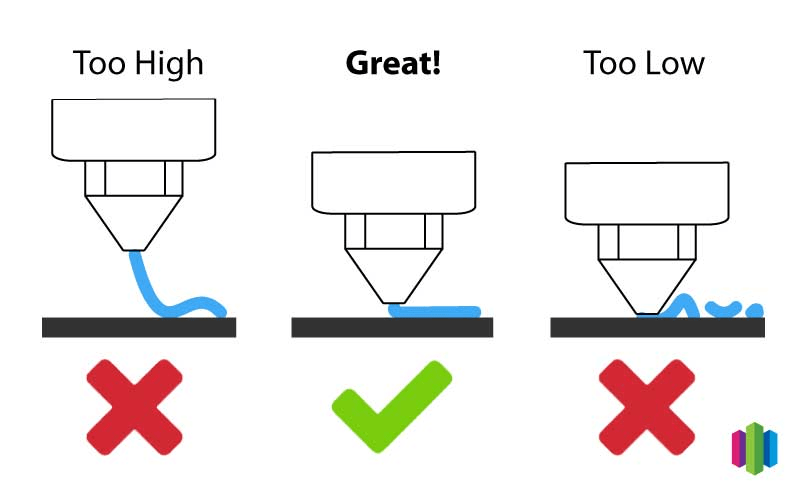
Nozzle Too Close to Bed
If the nozzle is too close to the printing surface, it can squeeze out too much plastic and cause it to scrape around unevenly instead of laying down a smooth layer. This results in poor adhesion or ripped up plastic. Generally a 0.1-0.2mm clearance is best for the first layer.
Poor Bed Leveling/Adhesion
Proper mechanical leveling of the bed is key to get an even distance to the nozzle. Even a slight unevenness can cause one area of plastic to lay too thin and not stick while another area gets squeezed out. Also build surfaces like glass need proper adhesion methods like glue or hairspray to get strong bonding of the first layer.
In conclusion, balancing factors like temperature, nozzle distance, and bed preparation are crucial to obtain smooth, even and well-adhered initial layers in 3D printing fixes to prevent downstream issues like warping, ripples or delamination. With some tuning one can achieve very reliable and high quality first layer results.
Fixes for Common 3D Printing Warping and First Layer Problems
Settings to Prevent Warping
Proper extruder and bed temperatures are key 3D printing fixes to prevent warping as the print cools. Slower print speeds also help parts cool gradually. For PLA, try an extruder temp of 205°C, bed 60°C and printing speed of 40mm/s.
Apply Adhesives to Build Plate
Using adhesives like glue sticks, hairspray or adhesive sheets helps parts better adhere to build plates as they cool to avoid warping. Apply a thin, even layer before each print.
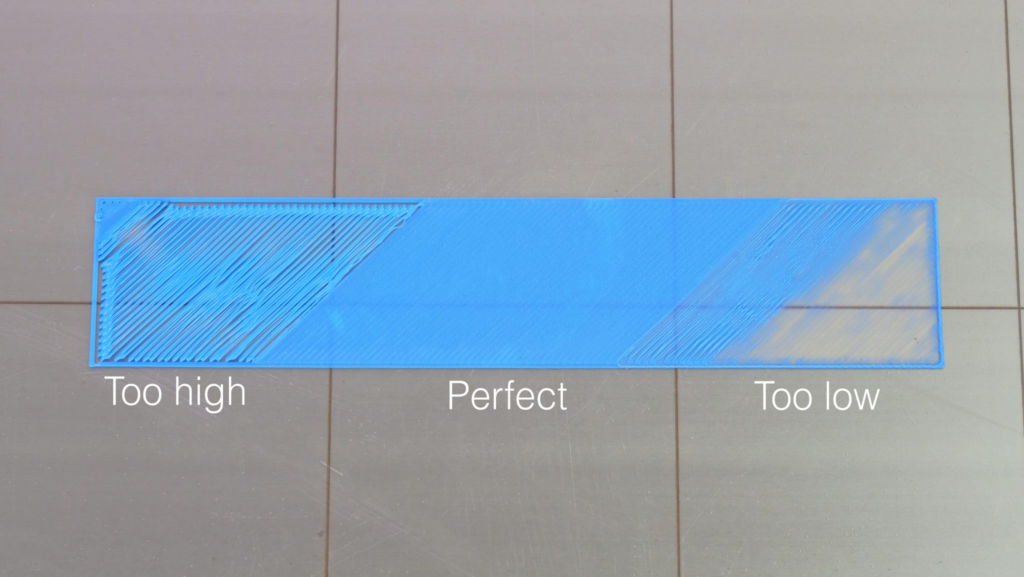
Solutions for Rough First Layers
Calibrate the Z-offset so the nozzle is the right distance from the bed, usually 0.1-0.2mm. Also tune the extrusion flow amount so plastic is not over or under-extruded which causes rough layers.
Level Print Bed and Clean Build Plate
Use paper or feeler gauges to precisely level the four corners and center of the heated 3D printing fixes bed. Also clean any debris which can cause poor adhesion.
Preventing First Layer Ripples
Avoid Premature Cooling
Enclosing the printer or adding a brim around parts helps prevent cooling drafts from forming ripples in the first layer before it fully bonds to the bed.
Ensure Consistent, Level First Layer
Calibrate E-steps, flow rates and bed leveling to lay down a uniform thickness of plastic across the entire bed. Even a slight variance causes ripples.
Achieving First Layer Adhesion
Clean Build Plate and Use Adhesives
Wipe build plates with isopropyl alcohol to remove oils before each 3D printing fixes. Apply a glue stick or hairspray to help achieve strong bonding of that initial layer.
Adjust Temperature, Speed for Optimal Bonding
Determining the right bed/extruder temp combo and slowing the print speed aids bonding. This prevents poor layer adhesion leading to failed prints.
In summary, calibrated settings, even layers and using adhesives creates reliable first layer adhesion to overcome common issues like warping, ripples and elephant’s foot. With some tuning, 3D metal printing can yield flawless first layers.
Optimizing Printer Settings for Perfect First Layers
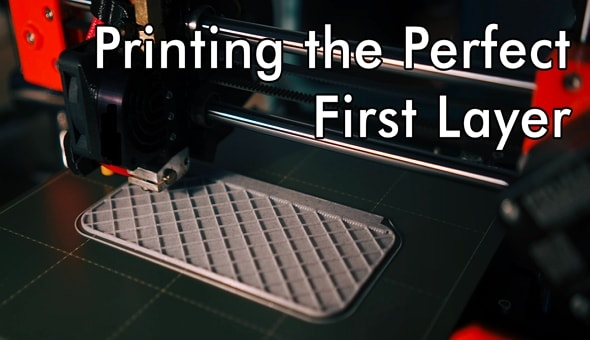
The first layer of a 3D printing fixes lays the foundation for the entire model. Small tweaks to settings can make a big difference in achieving a smooth, well-bonded initial layer. Here are some tips:
Adjust Print/Bed Temperatures and Speeds
Getting the temperature just right for your filament is key. For PLA, a print temperature of 200-210°C and bed of 60-65°C typically works well. ABS needs higher temperatures of 230-250°C and 80-90°C. Going too low can cause poor bonding while too high leads to warping. Slowing first layer speeds to 20mm/s improves adhesion.
Configure First Layer-Specific Settings
Many printers allow customizing the first layer only. Adjustments like increasing extrusion width by 5-10% ensures proper filling between lines. Reducing speed to 15mm/s lets plastic bond firmly before adding subsequent layers. Increasing layer height by 0.05-0.1mm may also help.
Implement First Layer Helpers
Applying a thin layer of glue stick or hairspray on the bed provides a surface the plastic readily sticks to. Using a brim around models adds an outer ring that prevents warping. Enabling a raft lays down extra material beneath the first layer for better support.
Master Techniques for Filament Types
With PLA, a lower bed temp around 60°C works well. ABS needs a warmer heated bed at around 80°C to prevent curling. Flexible filaments like 3D printing fixes TPU require lower temps and thicker first layers for proper squish. Experimenting helps dial in optimal settings for specific 3D printing materials.
Calibrating and tweaking these first layer settings transforms a print from a poor initial bonding experience to a flawless first layer that makes or breaks the success of the whole model. Taking the time for precise adjustments ensures perfect foundations.
Conclusion
Achieving that perfect first layer is crucial for ensuring successful 3D printing fixes. However, getting the right settings can take some trial and error. This is why it is important to understand all the factors that influence initial layer quality such as temperature, print speed, flow rate, nozzle height, and bed leveling. Armed with this knowledge, printers can be meticulously calibrated.
The first layer must have excellent adhesion to the print surface for the model to be built upon layer by layer without issues like oozing, warping or delamination occurring. Tests should be done with different filaments and adjustments made to the temperature and speeds accordingly. It also pays to have helpers like brims, glue, or rafts activated when needed. With some tuning of these main settings, parameters can be optimized for flawless first layers.
Mastering first layer perfection takes time but yields dividends through reliable prints that don’t detach or warp. Getting the foundations right through meticulous calibration eliminates issues downstream. 3D printing tooling enthusiasts should make these tweaks an area of focus to witness huge improvements in success rates and part quality overall. Perfect first layers are possible with the patience required for setting optimization.
FAQs
Q: When should I level my bed?
A: The bed should be leveled before every print and anytime it is adjusted or removed. Poor leveling causes layer issues.
Q: How close should the nozzle be?
A: Approximately 0.1-0.2mm from the bed is usually the sweet spot for most materials. Too close or far will degrade quality.
Q: What temperature is best for PLA?
A: Most PLA filaments print well between 180-210°C with a bed of 50-60°C. Small variations work for different colors or brands.
Q: How do I reduce suction noise on glass?
A: Apply a very thin layer of adhesive or change to textured build sheets, slow speeds, and enable brims or rafts for better adhesion without suction.