Skip to content
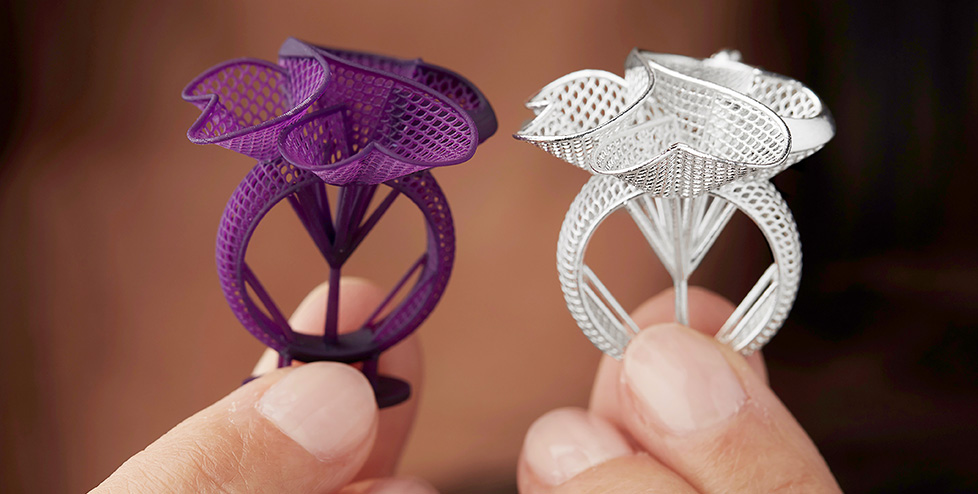
 3D printing technology revolutionized multiple industries through innovations that allowed fast development of complex shaped products. DLP has proven its popularity among various 3D printing techniques because it delivers highly detailed prints and superior surface finish. The DLP Resin 3D prints process requires resin print curing to be a fundamental step. It solidifies the material, and it makes it produce a final product that is very durable. In the following section, this piece of equipment provides the simplest and efficient method for curing DLP resin prints
DLP Resin 3D Prints Overview
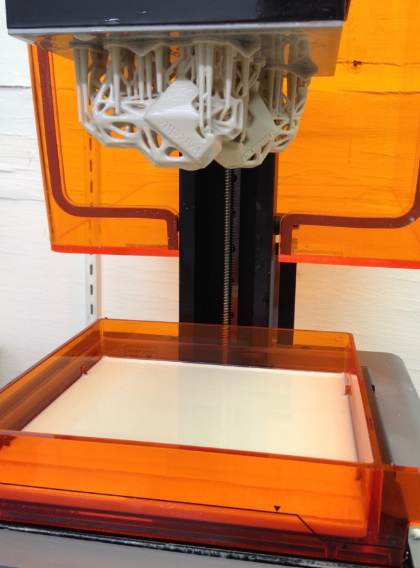
The digital light projector, functioning through DLP technology, creates solid objects by curing liquid resin one layer at a time. DLP Resin 3D Prints utilize a digital mask that directs UV light through a photosensitive resin vat during the printing process. This technology demonstrates faster print speeds compared to FDM, as all layers can be cured simultaneously rather than through a line-by-line process.
Curing is an essential operation in DLP Resin 3D Prints, as it converts liquid material into a hardened state. The mechanical properties and shape stability improve when a printed object undergoes sufficient curing. Inadequate curing often leads to printing defects such as warping, brittleness, and surface quality deterioration.
Purpose of UV LED Ovens
In the post-processing stage of DLP Resin 3D Prints, UV LED ovens play a vital role in ensuring an optimal environment for curing resin prints. In these ovens, ultraviolet light emitted by LED sources is used to initiate and accelerate curing. The principal purpose of using a UV LED oven is to ensure that the entire print is uniformly cured, producing a final product that is stronger and more durable.
Among its various advantages over traditional methods, such as sunlight or conventional UV lamps, UV LED ovens offer superior efficiency. They provide a targeted wavelength to activate the photoinitiators in resins, achieving better results much faster. The inner surfaces of these ovens also carry reflective coatings, ensuring greater light scattering over different sides of DLP Resin 3D Prints for a more uniform cure.
Additionally, UV LED ovens allow for a controlled curing environment. Unlike outdoor sunlight, which varies with changing weather and intensity levels, UV LED ovens offer constant light output and temperature settings. This consistency is crucial for obtaining repeatable results over multiple prints and minimizing product quality variability.
Curing Process
Resin Curing Chemistry
Curing is a chemical process in DLP Resin 3D Prints, where liquid resin transforms into a solid through photopolymerization, driven by energy from light. Photopolymerization requires the use of photoinitiators—chemical compounds that absorb UV light and release reactive species to initiate polymerization.
There are various types of resins used in DLP Resin 3D Prints, each with specific curing requirements based on their formulation. Some resins may require longer exposure times or specific wavelengths to cure properly. Understanding these requirements is essential to ensure high-quality prints and complete curing of all parts.
Factors Affecting Curing Quality
Several factors affect the quality of curing in DLP Resin 3D Prints:
Environmental Conditions: High humidity and temperature fluctuations significantly impact the curing process. In humid conditions, the resin may struggle to bond effectively, leading to defects. Additionally, extreme temperatures can alter resin viscosity, affecting the final print quality.
UV Light Intensity and Wavelength: The intensity of UV light directly influences the rate of photopolymerization. While higher intensities can reduce curing times, they may also cause overheating or overcuring if not properly controlled. The wavelength of UV light is equally critical, as most resins used in DLP Resin 3D Prints are optimized to cure at specific wavelengths, typically around 405 nm.
Components of a UV LED Oven

Essential Parts and Materials
To make a DIY UV LED oven for DLP Resin 3D Prints, you need the following essential components:
Reflective Materials: Foil tape or similar materials help enhance light distribution within the oven, ensuring even curing of DLP Resin 3D Prints.
UV LED Strips: These serve as the primary light source for curing resin prints.
Power Supply: A suitable power source is required to operate the LED strips efficiently.
Container: A durable container, such as a paint can, acts as the housing for the oven.
Design ConsiderationsIn designing a UV LED oven, several considerations are important:
Reflective Surfaces: Adding reflective materials inside the oven maximizes light exposure on all sides of the print.
Size and Shape: The size of the container should be able to accommodate different print sizes while having enough space for air circulation and even light distribution.
Building a DIY UV LED Oven
Step-by-Step Assembly InstructionsBuilding your own UV LED oven can be a fun project:
Gather Materials: Collect all the necessary components, including UV LED strips, power supply, and container.
Prepare Container: Clean and prepare your container by applying reflective materials inside.
Install LEDs: Attach the LED strips inside the container using double-sided tape or similar adhesive methods.
Wire Power Supply: Connect your power supply to the LED strips according to the manufacturer’s instructions.
Test Functionality: Test your set-up first by observing how well it cures small amounts of resin before using it with prints.
Safety Precautions
Safety is of utmost importance when working with UV light and resin materials:
Protect your eyes by using eye protection during all operations of the UV oven to guard against UV rays. Wear protective gloves for handling uncured resin materials to stop the development of allergic reactions and skin irritation. Workplace ventilation must be adequate during resin tasks because inhaling fume releases is harmful to your health.
UV LED ovens are an essential tool in enhancing DLP resin printing processes by providing efficient and effective curing solutions tailored for high-quality results. Understanding their function and construction allows users to optimize their 3D printing workflow while ensuring safety throughout the process.
Running the UV LED Oven
Running a UV LED oven correctly is very important to ensure that high-quality cured prints are achieved in DLP resin 3D printing. This section discusses recommended curing techniques, maintenance practices, and a comparison with traditional curing methods.
Curing Techniques
Learning the specific curing times needs to become second nature for operating a UV LED oven. Resin thickness alongside material type determines curing duration between 30 seconds and a few minutes. Lower thickness in combination with more compact printing designs needs produced shorter UV exposure durations but multiple minutes of exposure duration works best when making dense and thick prints. A proper curing process demands print rotation because it leads to uniform curing. You can achieve even curing through two methods including rotation on a platform and manual movement at scheduled intervals. The rotation of the print allows every surface to receive equal UV light exposure thus preventing problems from occurring due to incomplete exposure of some areas.
Maintenance and Care
Regular maintenance of your UV LED oven is crucial to ensure long-term functionality and effectiveness. The major maintenance activities are as follows:
Cleaning the Interior: Wipe down the interior surfaces of the oven regularly, removing resin residue and dust, which helps in maintaining optimal light reflection and preventing contamination.
Checking LED Functionality: It should be periodically checked for proper function of the UV LEDs. Burnt out LEDs must be replaced immediately to maintain consistent curing performance.
Calibration: Maintain your oven with adjustable intensity or time settings at optimal calibrations for more accurate curing processes.
Cleaning procedures should be performed with isopropyl alcohol or a suitable cleaner that won’t damage the reflective surfaces inside the oven. Avoid using abrasive materials that could scratch or dull these surfaces.
Comparison with Other Curing Methods
Traditional Curing Techniques
While UV LED ovens are gaining popularity for curing DLP resin prints, traditional methods still exist, including sunlight exposure and conventional UV lamps.
Sun Exposure: This curing method relies on natural sunlight but is not uniform due to inconsistent weather and changes in UV irradiance during a day. In addition, curing takes several hours.
UV Conventional Lamps: These use more controlled exposure than sun. However, conventional UV lamps often consume more power and produce too much heat; this can distort the print.
The advantages of using a UV LED oven over these traditional methods include faster curing times, greater control over light intensity and wavelength, and reduced energy consumption.
Efficiency and Effectiveness
When comparing efficiency and effectiveness between different curing methods, UV LED ovens stand out for their speed and precision. UV curing can initiate polymerization in seconds or minutes, significantly reducing production times compared to traditional methods that may take hours.
Cost-effectiveness is another critical factor when considering DIY UV LED ovens versus commercial options. Building your own UV LED oven can often be accomplished for under $50, utilizing readily available materials like LED strips and reflective containers. In contrast, commercial curing solutions can be significantly more expensive while offering similar results in terms of curing quality.
Advanced Features and Innovations
Smart Technology Integration
With time, it is possible to incorporate smart features into UV LED ovens. IoT-enabled systems may enable distant monitoring and control of a curing process over one’s smartphone or computer. Such features may include real-time data on temperature, humidity, and UV intensity to optimize the conditions for specific resin types automatically.
In addition, using sensors for intensity modification according to the print characteristics could help increase the efficiency and uniformity of curing.
Trends in UV Curing Technology
Future trends in UV LED curing technology are expected to deliver greater efficiency and higher performance. Some possible innovations may include developing stronger LED components capable of curing quickly with lower energy consumption or hybrid configurations where combinations of various light sources can be used for different purposes.
Predictions further suggest advancements in material science leading to new formulations of resins tailored for specific optimal performance in UV LED curing technologies. Advances will probably make them more robust in terms of strength and flexibility, while avoiding post-curing defects.
Conclusion
In summary, the UV LED ovens greatly assist in curing processes of the DLP resin 3D print, so there is immense enhancement in product quality and reliability at the output stage. Keeping knowledge of perfect curing techniques as well as good management of oven operations will further deliver consistent prints which meet any users’ need while printing. The advantages of UV LED ovens over traditional curing methods are faster curing times, improved energy efficiency, and better control over light exposure. These make them an essential tool for both hobbyists and professionals in the 3D printing field.
The further advancement of technology will be accompanied by the incorporation of smart features and innovations in materials science into UV LED curing systems. This development is likely to simplify workflows, improve print quality, and open up more applications for DLP resin printing. This means not only improving production efficiency but also allowing users to explore new possibilities in 3D printing. This, therefore, makes investing in a UV LED oven a strategic move that may eventually lead to better results and higher satisfaction in the ever-changing landscape of additive manufacturing.
FAQs
1. How long should a DLP resin print typically be cured in a UV LED oven?
Generally, curing time for DLP resin prints within a UV LED oven is about 30 seconds to several minutes, depending upon the thickness of the resin, the type, and the thickness. It will be best if the manufacturer instructions are followed about specific curing time.
2. Will a UV LED oven cure many different resins?
Yes. A UV LED oven will be able to be used with virtually all types of DLP resins. Please note, though, that most resins may have unique requirements for exposure and wavelength. Again, each manufacturer will give optimal curing information that should be carefully followed.
3. What kind of maintenance will be required on my DIY UV LED oven?
Regular maintenance tasks include cleaning the interior surfaces to remove resin residue, checking the functionality of the UV LEDs, and calibrating settings for intensity and time. Maintaining the oven clean and well-maintained ensures consistent curing performance.