Skip to content
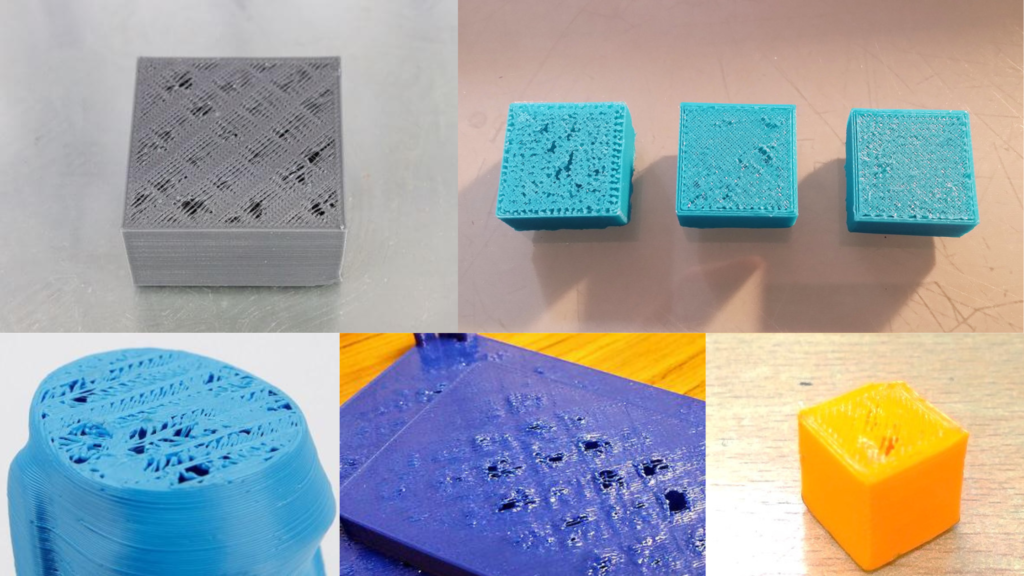
3D Printing Fixing is an incredible technology, but even the best printers can face challenges like layer shifting, warping, and unexpected print failures. These issues can be frustrating, especially when you’re working on a critical project. Fortunately, with the right techniques and troubleshooting methods, you can address these problems and achieve high-quality prints consistently. In this guide, we’ll explore practical tips and solutions to help you fix common 3D Printing Fixing, ensuring smooth, precise, and reliable results every time.
3D Printing Fixing: Solving Layer Shifting, Warping, and Print Failures
3D printing fixing has emerged as an essential tool used in the manufacturing industry where designers and engineers use it in the design of products and manufacture of very detailed items. Yet it is important to recognize that 3D printing jobs are not always smooth sailing and that problems may emerge which lead to low quality prints or even outright print failure. The most typical challenges which arise are layer shift, a situation in which the layers of the print are not properly aligned, warping, which is when the printed part twists and becomes misshapen or deformed, and print failure in all its forms.
Despite that, in combating different 3D printing fixing it is always the key to look for the root causes of the problem and apply the right remedies to get a consistent output most of the time. The main goal of this article is to give practical instructions on how to deal with several common print issues among the 3D printing users. The causes and remedies for layer shifting, warping and other failures will be also illustrated. It will also contain recommendations concerning the diagnostics of problems and systematic steps for problem solving. When used appropriately, it is possible to make high quality parts from a 3D printer with very low first part failure rates.
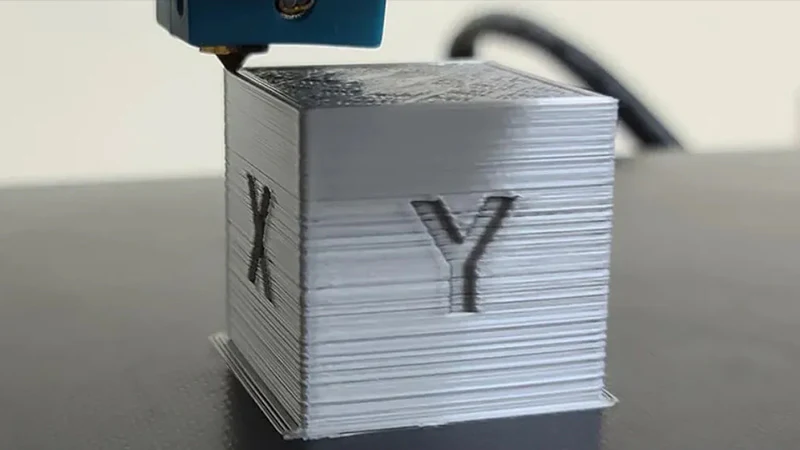
Layer shifting
Layer shifting refers to the misalignment of layers as they are deposited one by one during the 3D printing fixing process. Ideally, each new layer should be precisely positioned on top of the previous layer. However, shifts in horizontal positioning can cause layers to be displaced laterally, resulting in imperfections and poorer print quality.
Some common causes of layer shifting include belts or gears that have become loose or worn out over time. As the printer moves the print bed or extruder assembly up and down to print successive layers, worn or loose components may result in inconsistent movements between layers. Another possible cause is excess vibration during printing. If the bacterial 3D printing is placed on a wobbly surface or near a vibrating machinery, these surface vibrations can translate to the moving parts and cause layers to shift.
Improper build plate preparation and leveling is another issue that may lead to layer shifting. If the printing surface has bumps or imperfections, it cannot provide consistent contact for each layer to adhere to firmly. This can cause slipping of layers. Heated build plates that have warped may also cause shifting. To address layer shifting, one should first check the condition of any drive belts and gears on the printer and tighten or replace them if loose or worn out. Vibrations can be reduced using rubber feet beneath the printer or isolating it from other equipment. Ensuring a smooth, level printing surface is also important. Adding a layer of build tack or glue to the plate aids adhesion.
Mechanical stabilizers for specific parts can help suppress vibrations. 3D printing fixing with a brim around parts increases surface contact area for better adhesion between layers. For troubleshooting, examine individual printed layers under a microscope to locate any displaced areas. Perform test 3D printing in prototyping with different belt tensions to see if shifting reduces. Tweaking printer settings like movement speeds may also help minimize vibrations leading to shifting. With some experimentation, the root cause of layer shifting can be identified and rectified.
3D Print Warping:
Warping occurs when portions of a 3D printing fixing part curl up or distort from the intended flat or cuboidal shape. This happens due to uneven forces acting on the plastic as it cools after extrusion. Plastics shrink as they cool down from a molten to solid state, but if different regions cool at different rates, it results in non-uniform dimensional changes across the part, manifesting as curling or twisting.
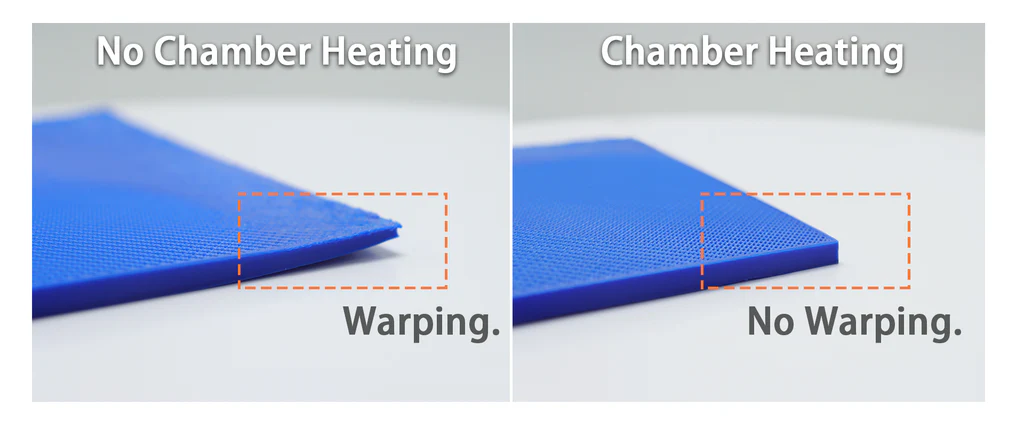
There are a few key factors that influence the warping tendency. Ambient temperature plays a role – higher room temperatures allow less time for even cooling. Some plastics like ABS are also more prone to warping compared to PLA. Printing in an enclosure with temperature control can help regulate the environment.
Warping also stems from uneven cooling between the exterior and interior of each 3D printing fixing layer. The exterior solidifies quickly upon extrusion while the inner areas take longer to cool once encapsulated. This leads to mid-layer stresses. A few strategies to counter this include adding a raft or brim that increases the base surface area and usage of 3D printing at an elevated bed temperature to slow outer-layer cooling.
First, inspect the dimensions and edges of completed prints for any bending. Try simple solutions like enabling a raft or adding a brim in the slicer settings. Slowing down the print speed can allow for more gradual cooling. Enclosing the printer maintains an even temperature. Adjusting bed temperature in small increments until the ideal temperature profile is achieved also helps minimize warping. You can also try different materials suited for your climate. With proper fine-tuning of settings and environment, 3D printing fixing can be made to retain their intended shapes.
Print Failures:
3D printing are sometimes marred by defects and failures that prevent successful completion. Some common types include detached parts, stringing or oozing, heat creep and blocked nozzles. Detached parts occur when layers or perimeters do not adhere properly, causing portions to separate 3D metal printing. This could be due to poor bed adhesion, overhangs that are too steep or cooling issues. Ensuring a clean, level bed and using adhesives can help. Slowing 3D printing fixing speed or adding support structures under overhangs may also remedy this.
Stringing is the unwanted extruded filament that connects parts instead of having a clean separation. It stems from excess filament ooze during retraction. Reducing temperatures, increasing retraction distance/speed and drying filament can minimize stringing.
Heat creep involves the softening and crawling back of filament into the nozzle as heat travels up the extruder assembly. This results in jamming and inconsistent flow. Improving cooling, insulating hotends and maintaining proper temperatures addresses heat creep.
Nozzle blocks are a common cause of failures and present as inconsistent extrusion, scratchy layers or lost prime. They occur due to debris accumulation inside the hotend. Regular cleaning of hotends helps. Checking for worn fittings or damaged PTFE tubes preventing proper sealing is also advised. Replacing the nozzle resolves severe blocks.
Thorough inspection of failed prints is important to narrow down the root cause. Start with simple troubleshooting like leveling beds, drying filament or tightening belts. Gradually move to checking temperatures, speeds and extruder components if issues persist. Documenting steps helps methodically solve 3D printing fixing problems. With practice, failure analysis becomes easier.
Filament Issues:
The choice of filament and its handling can significantly impact the 3D printing fixing process and quality of 3D printer. Common issues stem from damage, moisture absorption and contaminants in the filament.
It is important to carefully inspect filaments for any cracks, bubbles or deformities prior to loading it. Broken or tangled filament can jam the 3D printing fixing. Keep spools sealed when not in use to avoid collected dust and moisture. Most filaments like PLA and ABS are hygroscopic and absorb ambient moisture over time which affects print performance. Moisture trapped within can cause crackling sounds and bubbles during extrusion. It also hinders proper bonding between layers. Storing filament in a low-humidity environment and drying wet spools helps. For PLA, an all-in-one food dehydrator at 50-60°C for 4-6 hours is adequate.
Contaminated filament containing dirt, glass fibers or other foreign particles clog nozzles and strip gears. It is wise to thoroughly wash new filament to remove any manufacturing contaminants before initial use. Using filament from a reputable manufacturer also reduces this risk.
Variations in filament diameter beyond the nominal tolerance can cause under-extrusion or jamming issues. Cheap off-brand filament is more likely to vary. Measuring diameter and switching to alternatives helps. Proper handling and quality 3D printing materials make for consistent, problem-free prints. Taking basic precautions with filament storage, washing and moisture control go a long way.
Software Settings:
The 3D printing fixing software allows users to fine-tune various settings that control the overall printing process and quality. While default profiles are adequate for most basic prints, manual adjustments allow resolving issues. However, making too many changes simultaneously makes troubleshooting difficult.
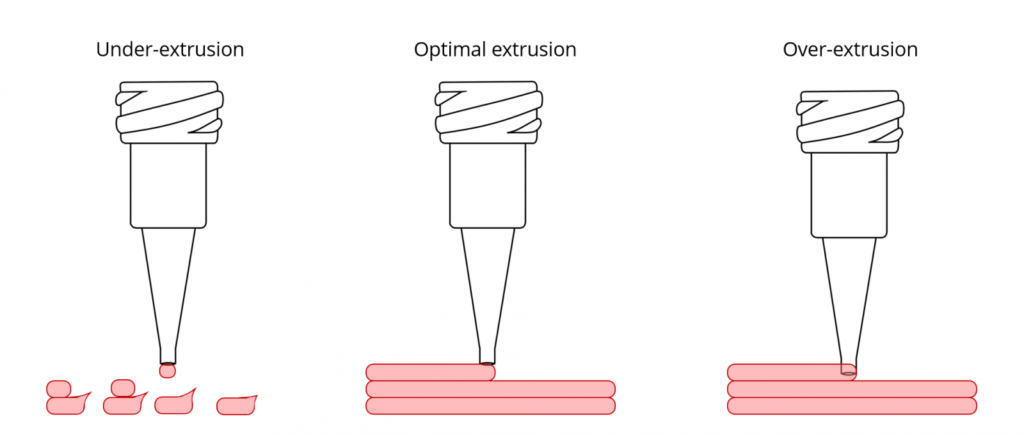
Temperature settings for the nozzle and bed need to be optimized for the material used. Print temperatures too low can lead to poor bonding or warping, while too high causes overflow and decreased strength. Layer height, wall thickness and infill percentage determine density and strength. Speed settings impact print time and quality tradeoffs.
3D printing fixing too fast stresses motors and reduces accuracy, while slow prints are time-inefficient. Initial layer speed ensures solid bed adhesion. Retraction settings pull filament back when moving to reduce stringing. Too much retraction causes under-extrusion, while too little leaves excess material. Finding the balanced distance and speed takes trial. Support settings automatically add structures under overhangs for stable prints. Enabling supports avoids detachment failures.
It is best to start with default profiles, and then gradually tweak one parameter at a time through test prints. Note observations after every change and revert settings if issues resurface. Over time, an optimal custom profile can be achieved for different models. Documenting the learning process through settings and results systematically solves filament and machine-specific issues.
Conclusion:
This guide has outlined some of the most common 3D printing fixing issues encountered – layer shifting, warping and various failure modes during the process. By understanding the root causes of these problems and applying relevant troubleshooting techniques, users can minimize 3D printing fixing defects and get the most out of their machines. It is important to take a systematic approach starting with simple solutions like leveling, tightening belts or drying filament before inspecting more complex factors.
Regular maintenance like cleaning and replacing worn parts also ensures consistent operation. With some experimentation, optimal temperature profiles and settings can be developed for individual printer-filament combinations. Recording observations helps refine the process over multiple 3D printing fixes. Adopting best practices around filament handling, environmental controls and software settings helps maximize productivity of 3D printing fixing.
FAQs:
Q: How can I prevent layer shifting and warping from the start?
A: Be sure to level your build plate carefully and use an adhesive or raft/brim setting which provides better adhesion. Also enclose your printer or print in a stable area away from drafts.
Q: What’s the easiest way to troubleshoot multiple issues?
A: Start prints using default settings to isolate hardware problems. Then make one tweak at a time, noting if it causes/fixes the issue. Also reach out to the 3D printing fixing manufacturer for firmware updates.
Q: Can dirty nozzles cause other problems besides blockages?
A: Yes, a partially clogged nozzle can lead to inconsistencies like under-extrusion or poor layer adhesion. It’s best to routinely clean nozzles, especially when switching filament types.
Q: How long should filament be dried for?
A: Most filaments need 4-6 hours in a food dehydrator set between 50-60°C. PLA only needs this when visibly moist – ABS/PETG benefit from drying each time.
Q: Is there a way to tell if filament is wet without specialized equipment?
A: Feel for stickiness or enable your printer’s filament load sensor to detect crackling during extrusion, both signs moisture may be an issue.